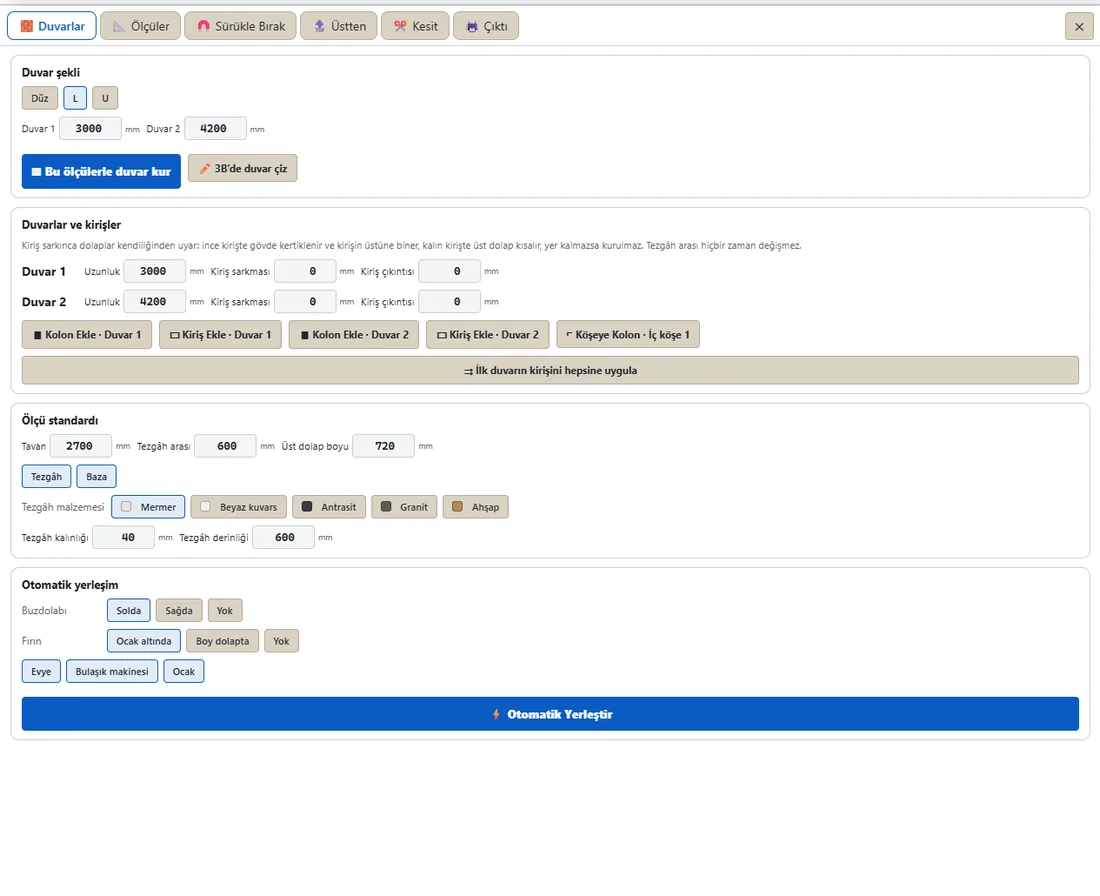
Wall, beam, column
Enter the wall dimensions and use ⚡ Auto Place to lay out the kitchen around the fridge, oven, sink, dishwasher and hob. Worktop, plinth and heights come from the size standard.
Desktop software for furniture shops
Draw the cabinet you will cut.
CabinetWizard builds the job the way a cabinetmaker sees it: part by part. In Production, a cabinet is not a picture. Side panel, top and bottom, shelf, back panel, door and plinth are separate, real parts. Click one, type its size to the millimeter, and its holes open automatically to match the neighbors. Whatever you build on screen goes straight to the cut list, the labels, the CNC file and the quote.
Developed with continuous feedback from more than 20 specialist manufacturers.
Who develops this software?Tied to no other program. Runs on its own on your Windows PC.
CabinetWizard is a desktop application in its own right. No SketchUp needed, nothing else to install or open: click the icon, it launches, you start working. Design, production output, quote and rendering live in one window.
Short clips from the program itself, all real screen recordings. In the 3D scene a cabinet works the way the real one does, from lift arms to hinges.
Bi-fold lift door
Two leaves fold upwards; watch the arms from the side.
Two-tier lift doors
Two doors, one above the other, each on its own piston.
Swing-up lift door
The door rises and turns up over the carcass.
Drawers and runners
One button opens them all, runners included.
Hinges up close
Watch the hinge move as the door closes.
Rotate a module
Select it, drag the ring or press the 90° button.
Columns, notched automatically
When a column meets a cabinet, the carcass is cut for it.
See inside with X-ray
Slide the column and watch the notch from the inside.
Drag and drop
Drop a module on the wall and read the remaining gap in mm.
Draw walls, get a kitchen
Draw the walls, auto-place, and the cabinets line up.
Change doors in one move
Pick a model and every door in the kitchen changes.
Help takes you there
Open a topic, press Go, and it moves to the right menu.
One-click render
Press Render, no other program needed. This scene took 5.2 seconds here.
Production
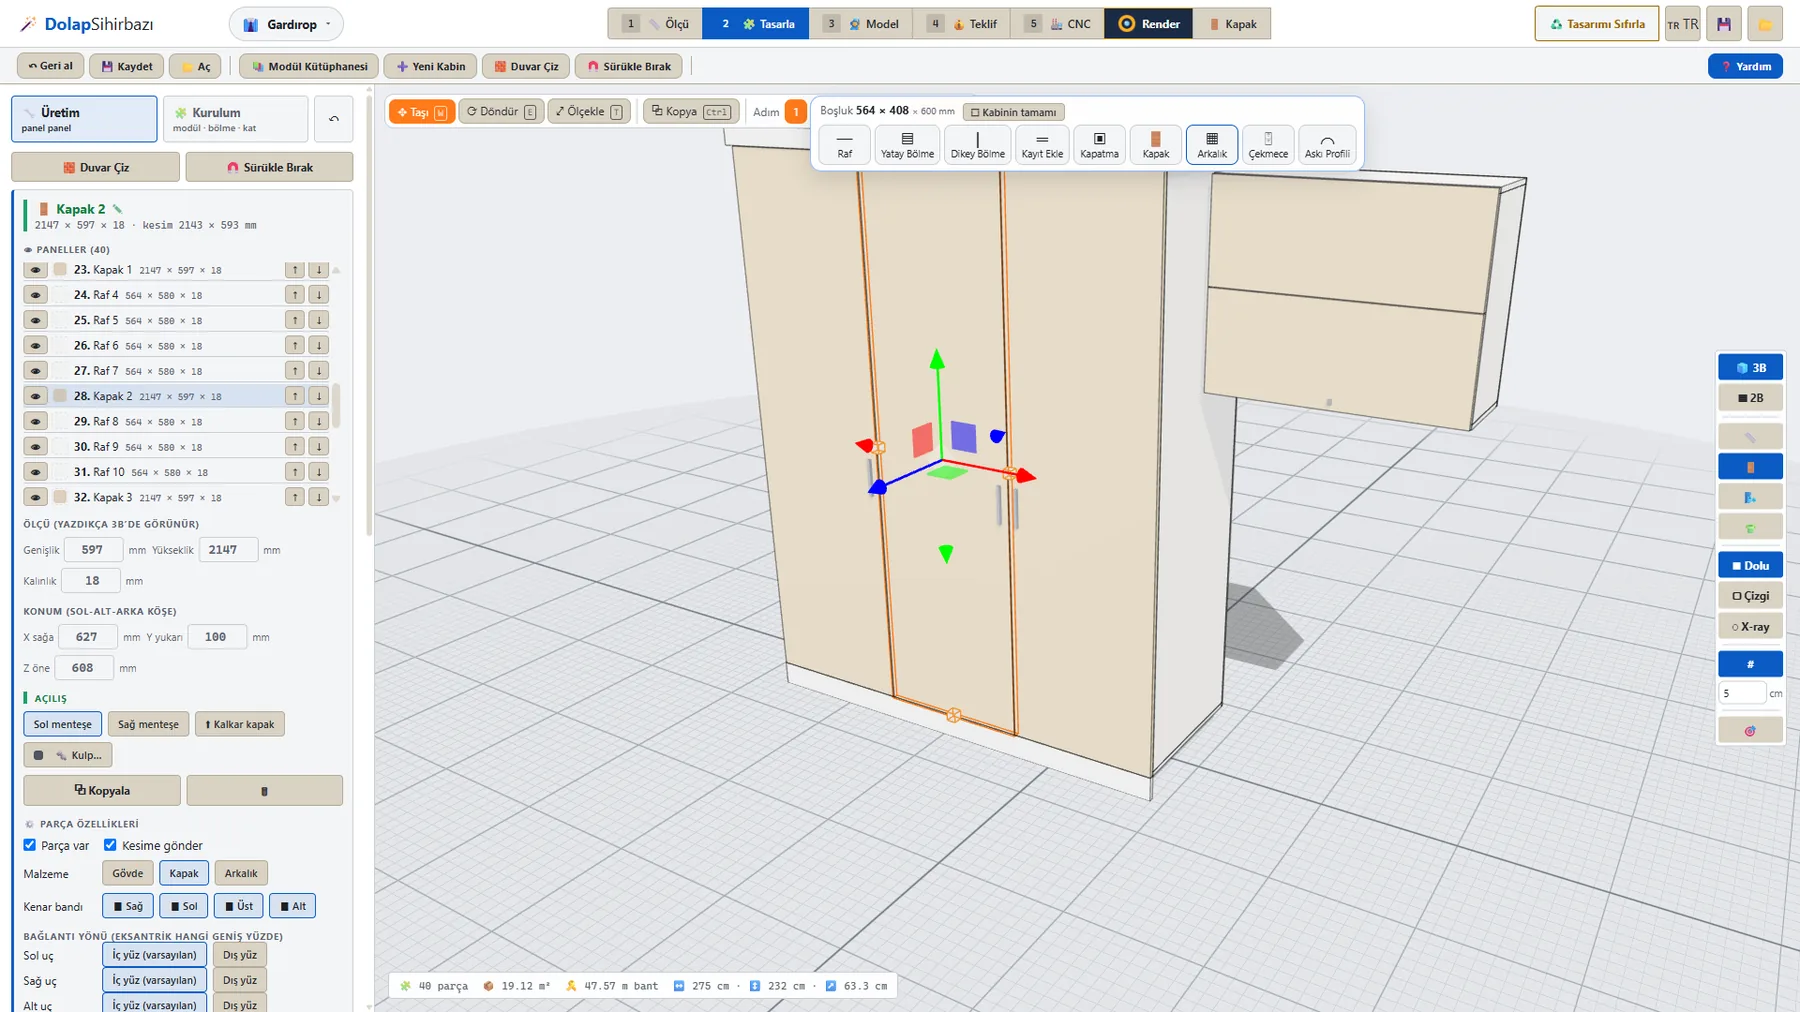
You are not stuck with ready-made templates. In 🔧 Production you build the cabinet like a master craftsman, part by part; every panel has its own size, material, banding and holes. Every fix you would make in the shop, you make here, so the cut comes out right.
Video on this topic
Lesson 1
The Production Screen: Menus and Use
Lesson 3
Build a Cabinet from Scratch: The Panel Palette
Version 0.6
Property Paint and Live Dimensions: Fast Transfer Between Cabinets
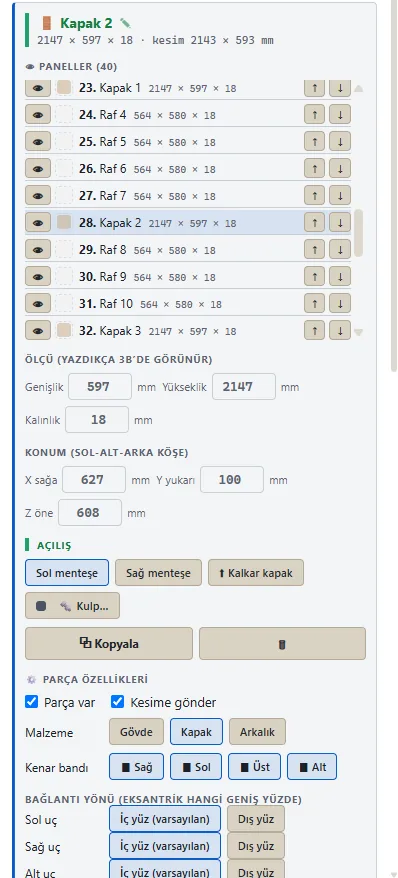
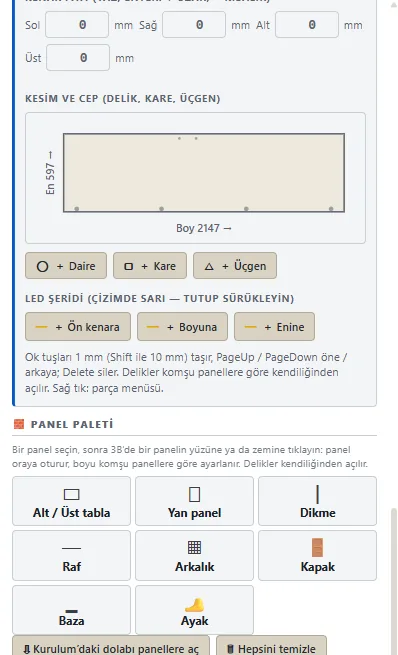
The left panel is the job card of the part you picked. The same layout for every part, from side panel to door:
Holes open automatically to match the neighboring panels. You build the part, the program works out the joint.
Video on this topic
Lesson 2
Precise Panel Editing: Size, Position, Gizmo
Lesson 9
Material and Edge Banding, Part by Part
Version 0.6
Carcass Joint Choice and Workshop Standards
Move your mouse over the opening inside the cabinet: the opening size and a toolbar appear on top. A part you add with one click fits the opening exactly.

Video on this topic
Lesson 7
Divide the Inside in One Click: Cell Bar and Cavities
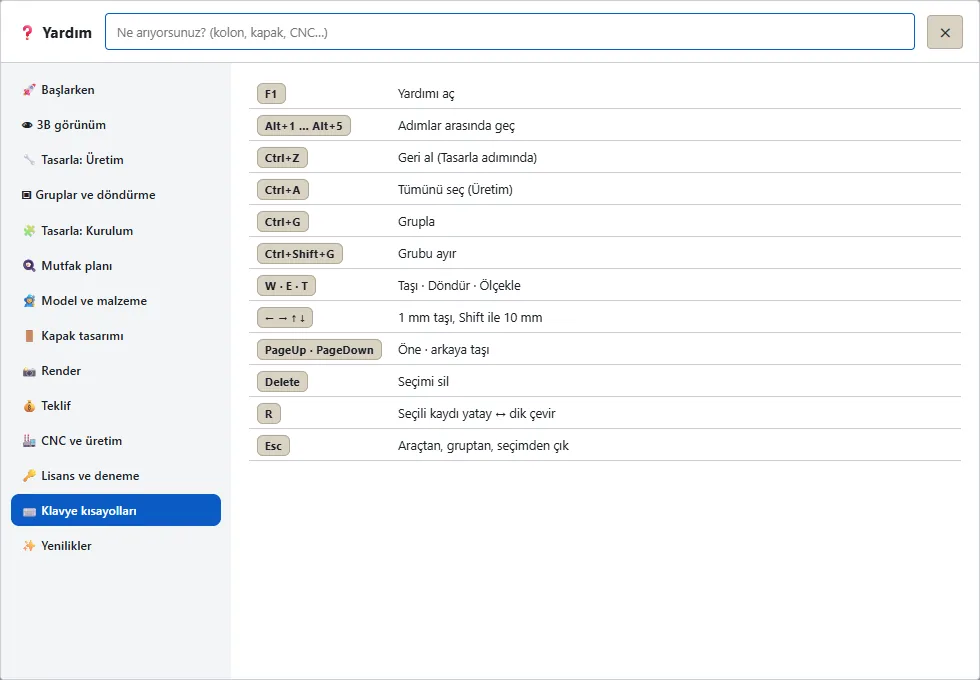
Click a part; the ✥ Move, ⟳ Rotate, ⤢ Scale bar and three axis arrows appear. Set the step to 1, 10 or 50, and Snap makes parts seat against each other.

| W · E · T | Move · Rotate · Scale |
|---|---|
| ← → ↑ ↓ | Moves 1 mm, 10 mm with Shift |
| PageUp · PageDown | Moves forward · backward |
| Shift + drag | Multiplies the step by 10 |
| Alt + drag | Turns Snap off |
| Ctrl + drag | Drops a copy in place |
| Number + Enter | Gives the exact size while pulling a face handle |
| Ctrl+A · Ctrl+G | Selects all · groups |
| Ctrl+Shift+G | Ungroups |
| Ctrl+Z · Esc | Undoes · exits the tool or group |
| Delete · R | Deletes · flips the selected rail horizontal ↔ vertical |
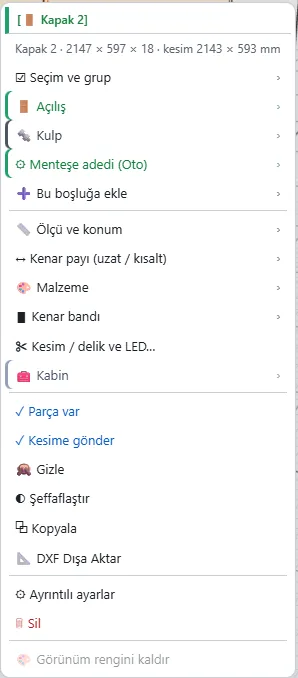
Find what you are looking for without digging through panels. The menu changes with the part you click.
To change the whole cabinet you do not walk through the panels one by one. Select the cabinet and type in the left card:
Video on this topic
Lesson 10
The Right-Click Menu That Speeds Up Design
Lesson 4
Change Cabinet Size from One Card: Quick Cabinet Edit
Lesson 6
Handleless Kitchen Cabinets: The Gola Profile
Lesson 5
Corner Joints: Butt, Corner Seat, 45° Miter
You turn a cabinet like lifting it off a shelf, but the cut stays intact.
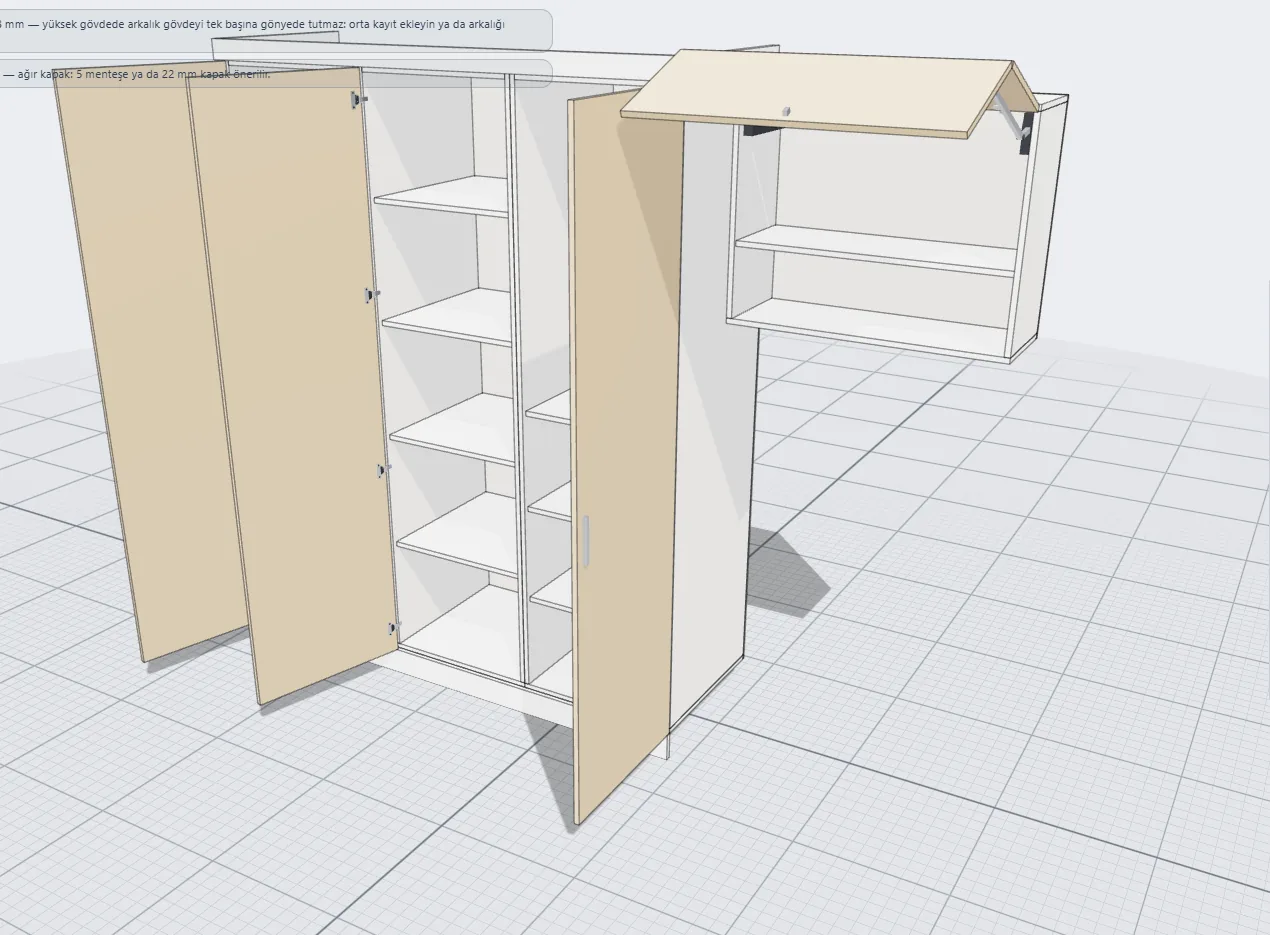
Open the doors with 🌬️ to see the inner layout, look inside with ◌ X-ray. Before you go to production, the program tells you what you missed:
The hinge count comes automatically from the door height; if you like, you set it yourself with a right-click. If the problem is serious, a ⛔ Production block appears at the CNC step, and no output is made until you say “I saw it”.
Video on this topic
Lesson 13
Selection and Groups in Multi-Cabinet Jobs
Overview
Catch the Wrong Cut Before It Reaches the Shop
Module Library
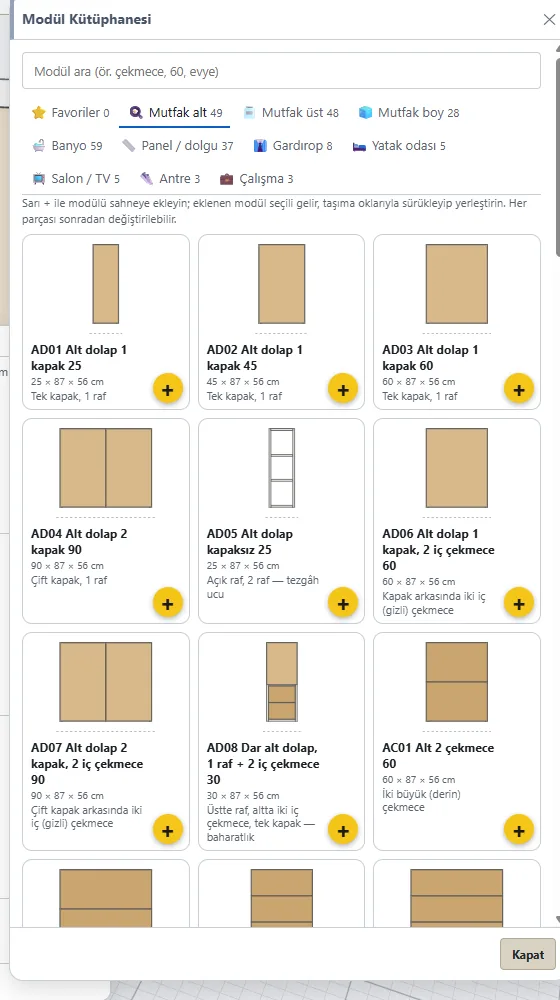
Type “drawer”, “60”, “sink” in the search box. The yellow + adds, the window stays open: you line up module after module. A module you add is not a picture; it is a real cabinet whose every panel you can edit in Production.
Put the cabinet you built into ⭐ Favorites so it is ready on the next job. Lift-up door, drawer and corner modules are in the library; a ready model loaded from the product menu also opens into Production panel by panel.
Video on this topic
Lesson 11
Line Up Cabinets in Minutes: The Module Library
Kitchen Plan
Start with the measurements you took at the customer’s home. Straight, L or U; type the walls, the program builds the rest.
Enter the wall dimensions and use ⚡ Auto Place to lay out the kitchen around the fridge, oven, sink, dishwasher and hob. Worktop, plinth and heights come from the size standard.
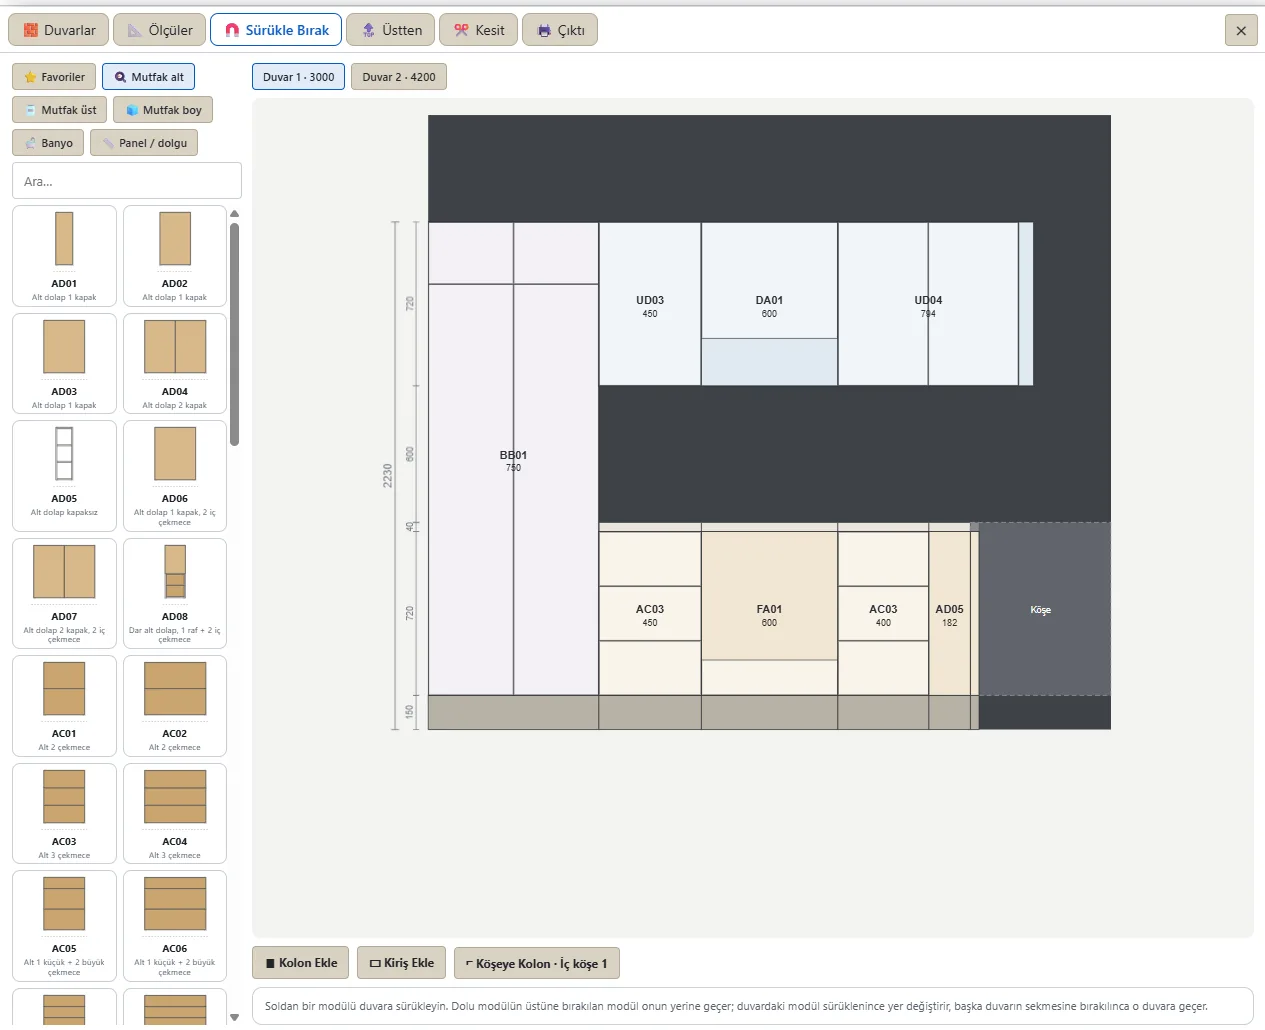
Drag a module onto the wall, type the width and the distance from the left, pick the hinge side. With one click of 🔧 Edit in assembly, jump to Production and go down into its panels.
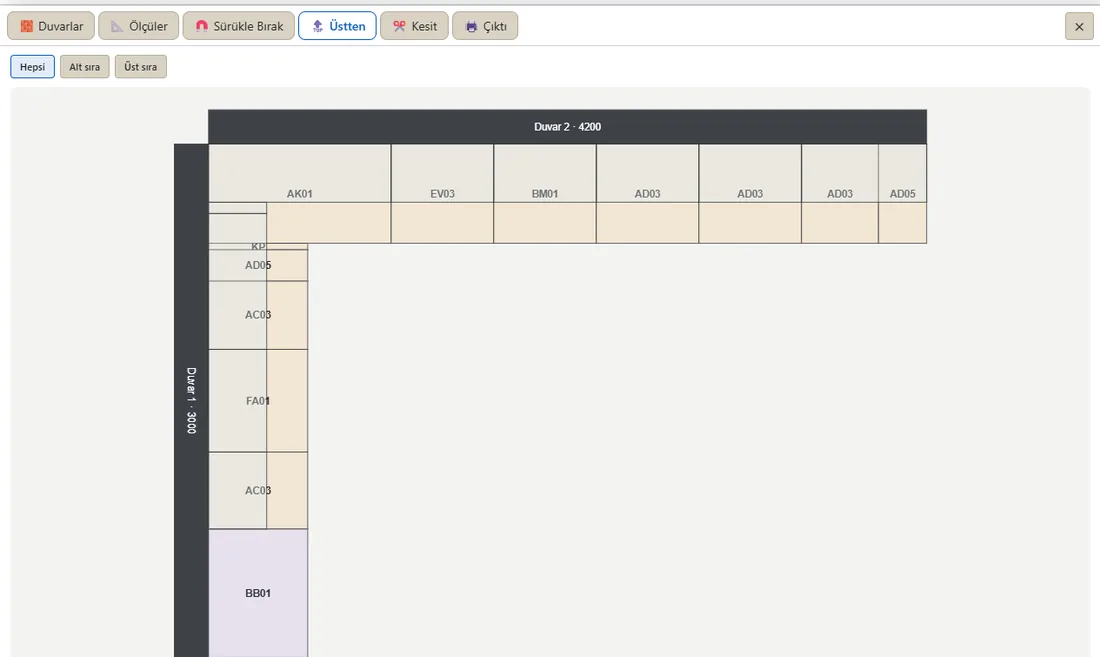
Top plan, section and elevation are ready. Print an A4 customer sheet with 🖨️ or print to PDF.
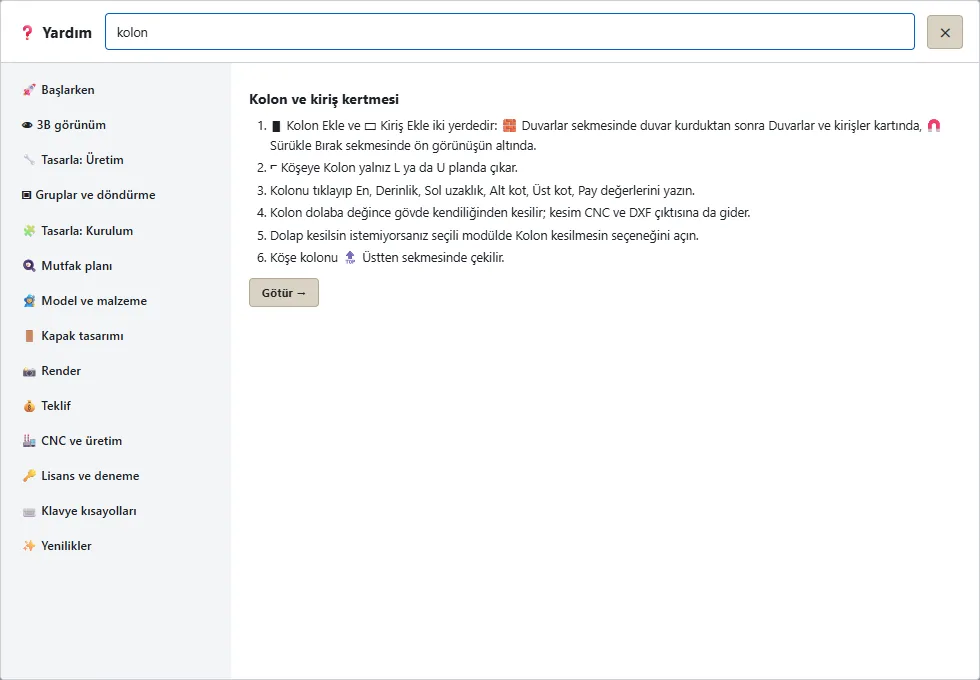
Enter the column and beam with Width, Depth, Left offset, Bottom level, Top level and Allowance. A corner column is drawn from above in L and U plans. When a cabinet meets a column, the carcass gets a notch; this cut goes to the CNC and DXF output too. On a module you do not want notched, say “Do not notch for column”.
Video on this topic
Lesson 12
Kitchen Plan: Draw the Wall, Drag and Drop Cabinets
Door Design
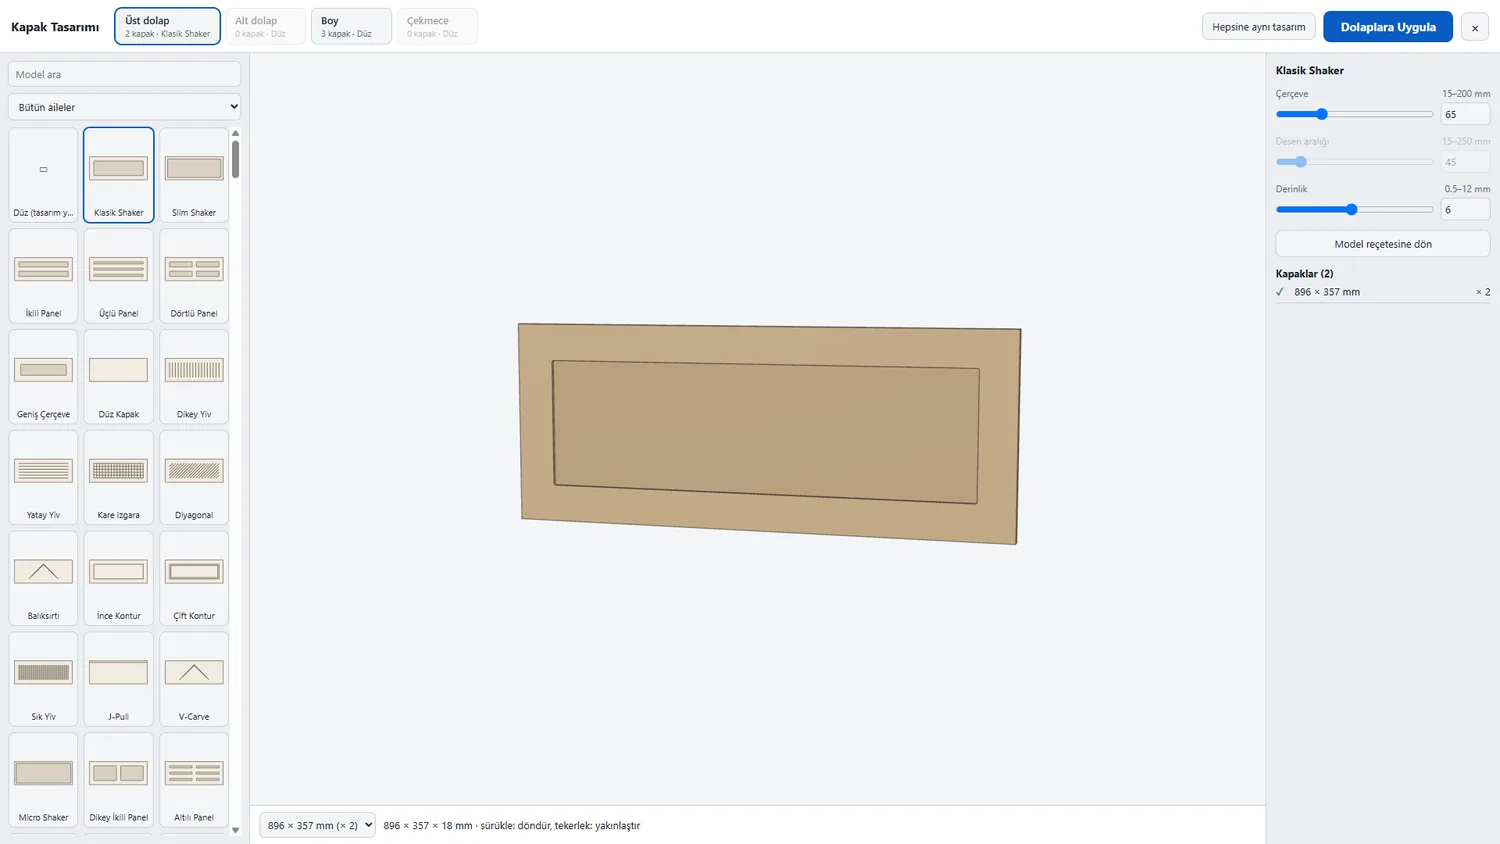
It does not paste a template; it builds the design on each door at its own size. You pick the wall cabinet, base cabinet, tall and drawer rows separately. Set the frame, pattern gap and depth with sliders; “Same design for all” writes to every row, “Apply to Cabinets” applies it in one step, ↶ undoes.
Video on this topic
Lesson 8
Adding Doors and Drawers: Runner, Box, Overlay
Version 0.6
Hinge Count and Height to the Millimeter, Door Overhang
Studio Render
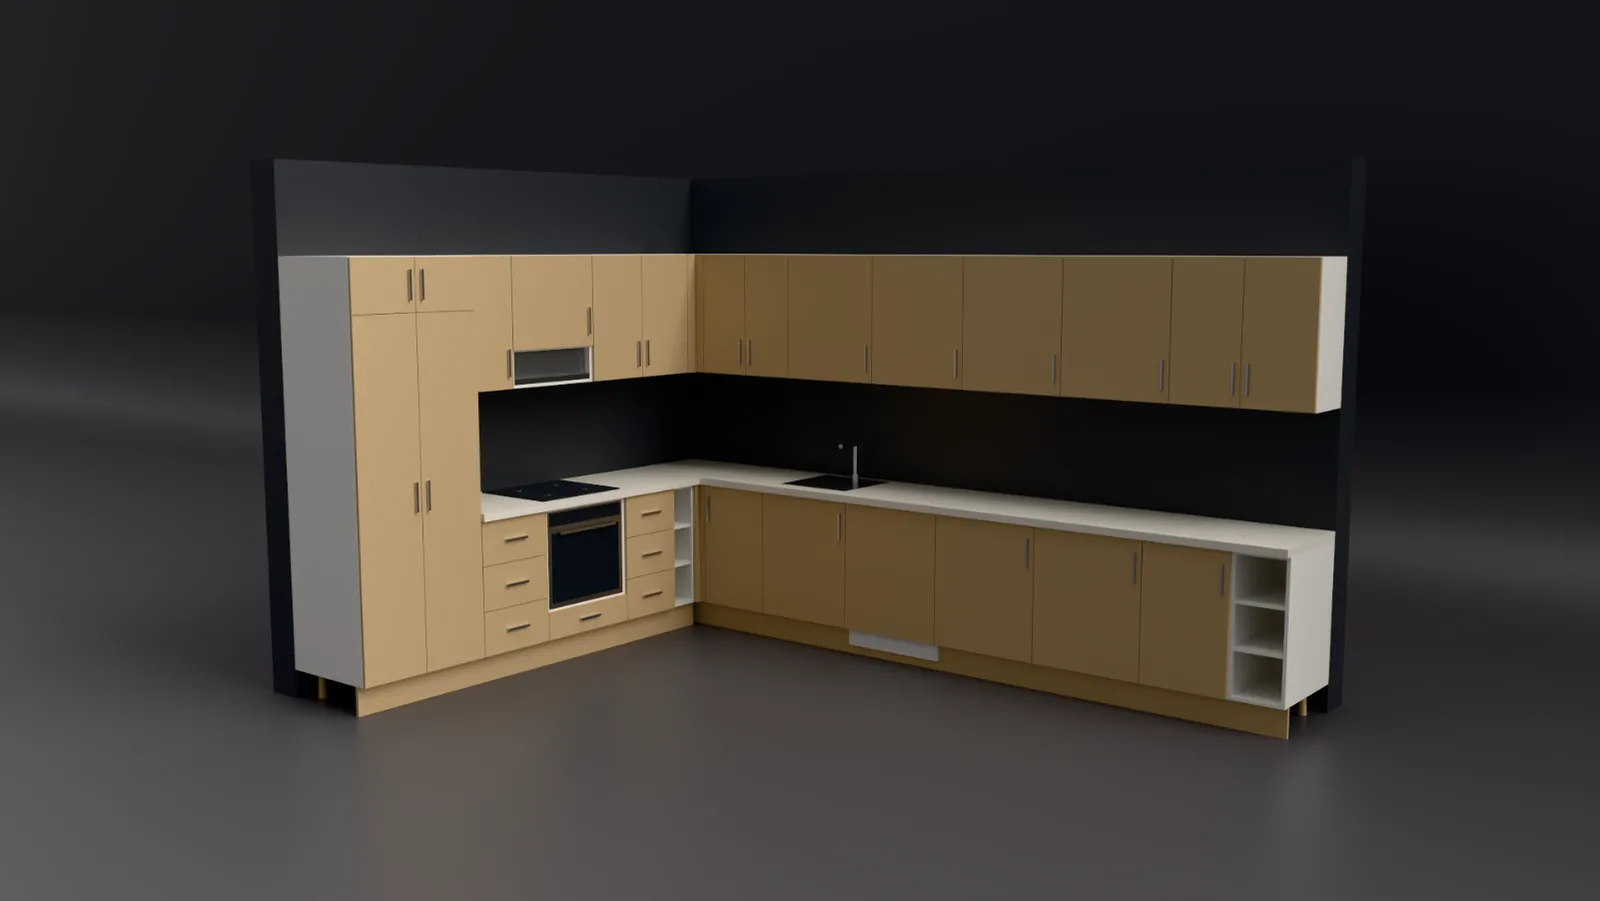
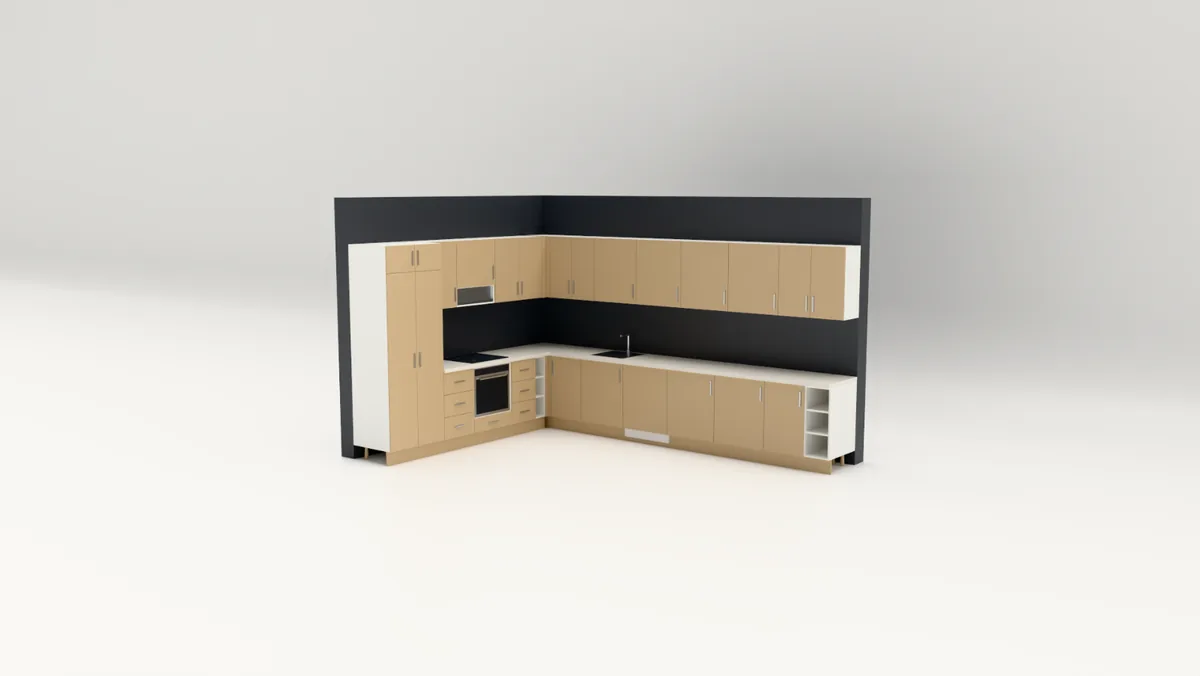
The Render Fun engine is inside the program. Press the Render button at the top and it does the rest: no settings, no export, no second program. The engine works out the scene by itself, cleans the noise, and a customer-ready image comes out.
The scene above was “Ready” in 6–11 seconds on our development machine. The time varies with your graphics card.
Quote and materials
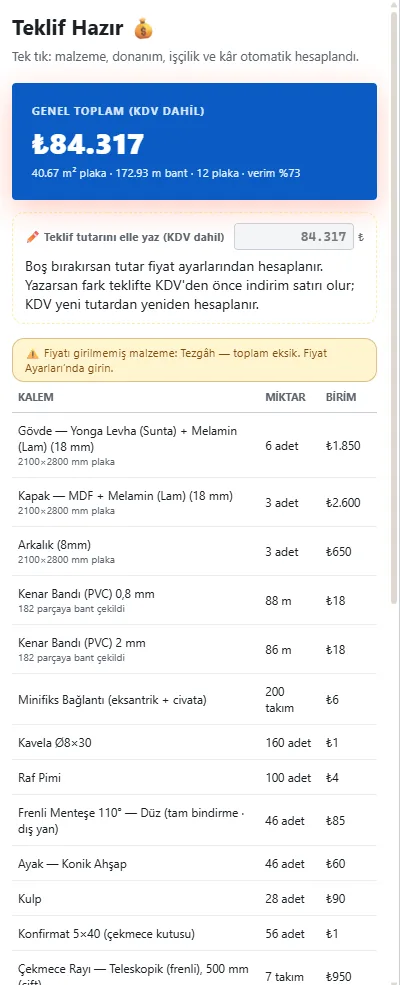
The moment the design is done, the total comes out by itself: material, hardware, labor and profit, line by line. Because the quote is calculated from the panels you built, not from a guess.
CNC and shop floor
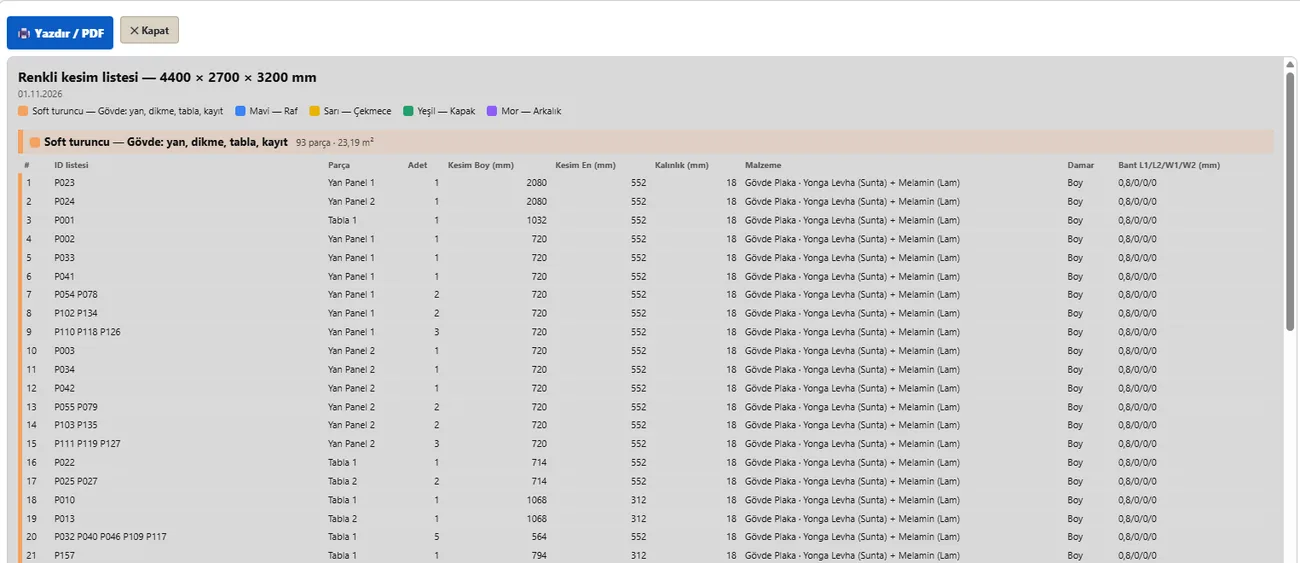
Everything that goes to the cutting room, the CNC, the edge bander and the assembler comes out of the same project. No writing separate lists, no counting parts, no carrying measurements over.
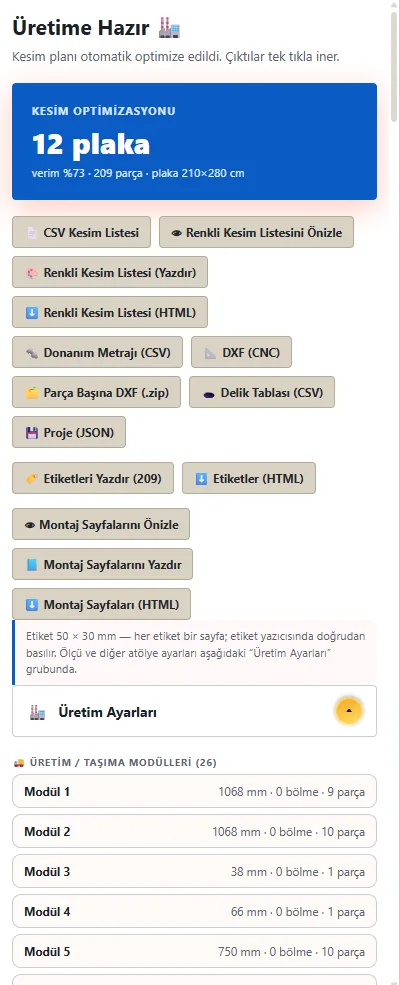
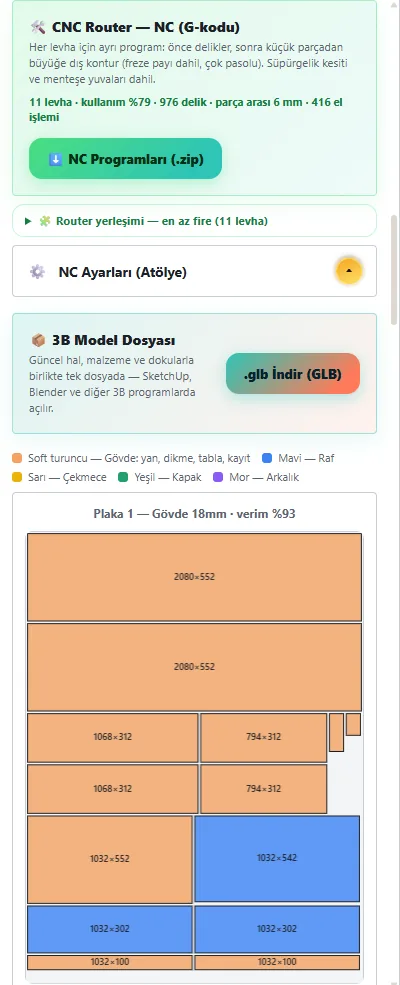
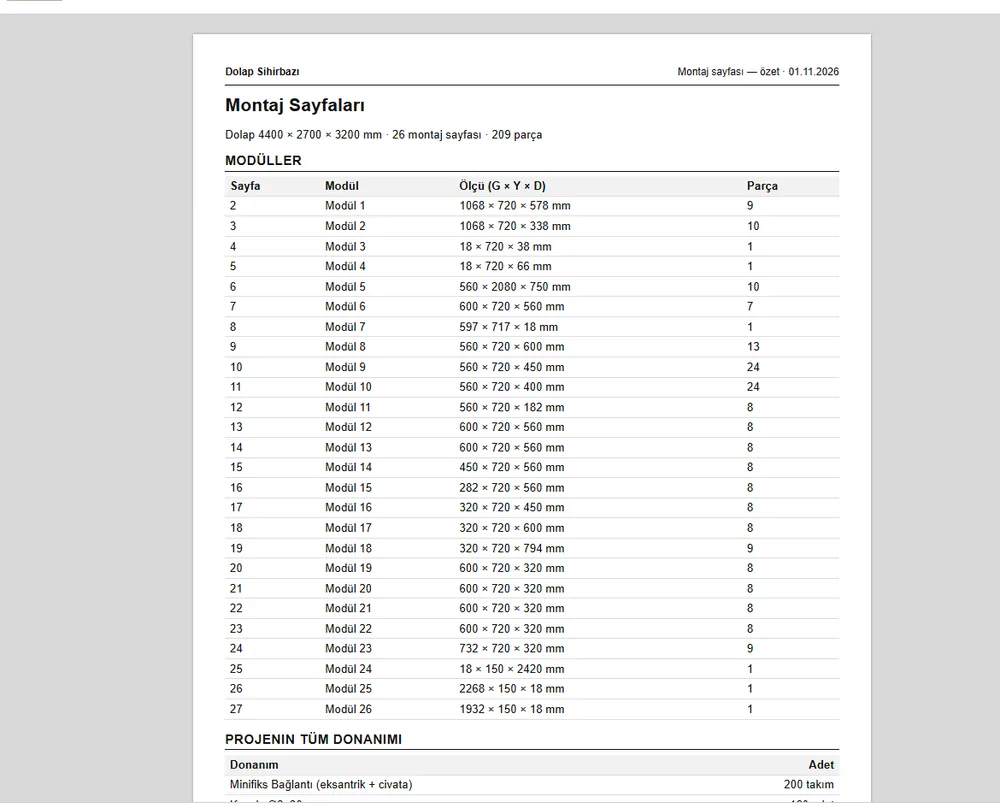
NC programs are produced with your shop settings. Verify the first job on your machine with a test part.
Video on this topic
Lesson 14
Cut List and Sheet Layout, Straight from the Model
Lesson 15
From Model to CNC Machine: DXF, G-code, Labels
Version 0.6
Customer Changed a Size: Cut Only What Changed
Help
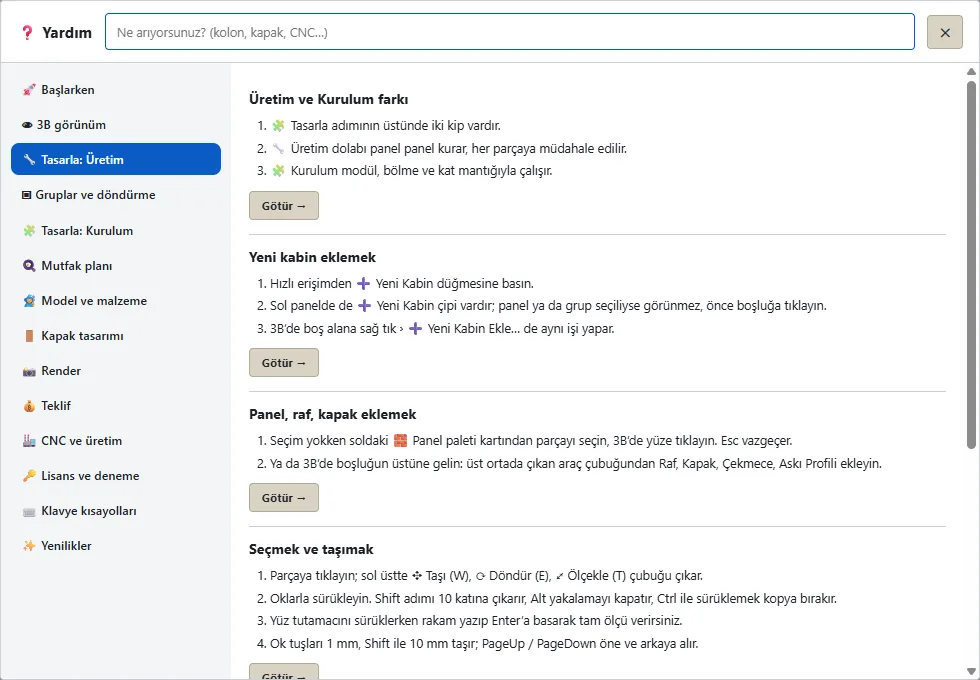
The new apprentice, or the master who is not great with computers, is never left alone. Press F1 or click ❓ Help at the top right; the program guides you step by step.
Training
From the Production screen to CNC output, each topic has a short lesson. All videos are narrated in Turkish; the screens show every step.
Lesson 1
The Production Screen: Menus and Use
Lesson 2
Precise Panel Editing: Size, Position, Gizmo
Lesson 3
Build a Cabinet from Scratch: The Panel Palette
Lesson 4
Change Cabinet Size from One Card: Quick Cabinet Edit
Lesson 5
Corner Joints: Butt, Corner Seat, 45° Miter
Lesson 6
Handleless Kitchen Cabinets: The Gola Profile
Lesson 7
Divide the Inside in One Click: Cell Bar and Cavities
Lesson 8
Adding Doors and Drawers: Runner, Box, Overlay
Lesson 9
Material and Edge Banding, Part by Part
Lesson 10
The Right-Click Menu That Speeds Up Design
Lesson 11
Line Up Cabinets in Minutes: The Module Library
Lesson 12
Kitchen Plan: Draw the Wall, Drag and Drop Cabinets
Lesson 13
Selection and Groups in Multi-Cabinet Jobs
Lesson 14
Cut List and Sheet Layout, Straight from the Model
Lesson 15
From Model to CNC Machine: DXF, G-code, Labels
Version 0.6
Hinge Count and Height to the Millimeter, Door Overhang
Version 0.6
Carcass Joint Choice and Workshop Standards
Version 0.6
Customer Changed a Size: Cut Only What Changed
Version 0.6
Property Paint and Live Dimensions: Fast Transfer Between Cabinets
Overview
Catch the Wrong Cut Before It Reaches the Shop
Overview
From Measurement to Machine in 5 Steps
No. CabinetWizard is a Windows desktop application that runs on its own.
Only for the first activation. After that it works offline.
The license is for a single computer.
No separate engine is needed, Render Fun is inside the program. The time varies with your graphics card.
We are still working on the program. When it is ready, you will be able to get it from this page.
A new workbench for your shop is on the way
Panel by panel design, one-key cutting, rendering inside the program. All in one window, on your Windows PC.